Painting Doors And Trims
This is an excerpt from the Book called “Home improvement“. Continue reading to learn more about Painting Doors And Trims, thanks to the author.
Painting doors, windows, baseboards, and moldings successfully involves six key steps:
- Clean and prime to achieve maximum adhesion.
- Smooth the surface so that cracks, holes, dents, and chips don’t show through the finish coat.
- Mask adjacent surfaces so you can paint quickly and confidently.
- Keep a wet edge to eliminate any lap marks.
- Avoid overlooking paint; brush it on and it flow to avoid brush marks.
- If closing a partially dry door is unavoidable, place plastic wrap between surfaces that touch.
Painting Doors
Minimize brush marks by painting your door in the order shown at right. Moving from top to bottom, working in this order gives you time to feather the paint in adjacent sections before it dries. Paint all of the edges first; then work on sections 2 through 5 at the top of the door before moving to the bottom portion.
Professionals often paint a door without removing it from the jamb. Placing the door on sawhorses and painting in the order shown, though, will avoid the drips that inevitably occur when you’re painting vertically.
If the door has knots or strong variations in grain or color, it’s a good idea to spot-prime the offending areas with a stain-blocking primer to prevent problems with coverage in the final coat.
Painting order:
- All edges
- panel bevels and flats
- Rails
- Stile middles
- Stiles
Painting Doors
- Remove all hardware from the door. Insert long screws in the top and bottom edges and suspend the door on sawhorses. Fill holes and gauges, spot prime knots, and sand the door as necessary with 80-gril sandpaper. Follow up with 220-grit sandpaper so the sanding marks won’t show under the finish coat.
- Prime the door. Use a tinted, stain-blocking primer to prime the door, following the painting order above. When the prime dries, sand it lightly and remove the dust with a tack cloth. Apply the finish coat of paint in the same order.
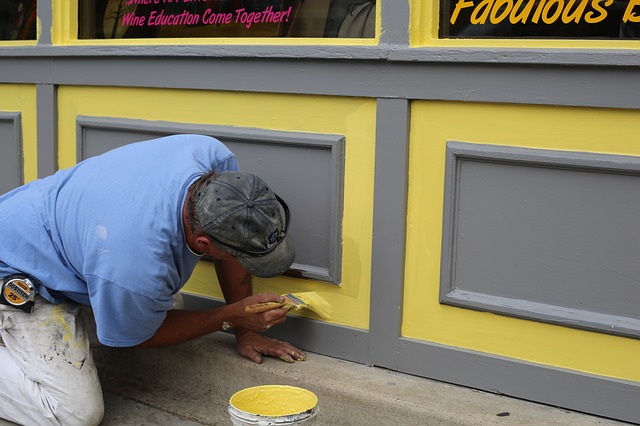
Painting Trim
When you are painting trim, the critical tools are the paintbrushes. Too wide, and you won’t be able to paint nearly. Too narrow, and you’ll have to rework the paint unnecessarily. Choose brushes with bristles appropriate for the kind of paint (latex or oil/alkyd) you are using, and don’t skimp on the quality. For most trim jobs, a 11/2- or 2-inch brush works well, but in some instances, you may need several brushes:
- An angled sash brush for laying down sharp edges.
- A square-edged trim brush for laying down flat areas of paint.
- An oval brush for getting paint into tight areas.
- Clean the woodwork with a TSP solution, using a plastic scrub pad to remove residue (wear rubber gloves). Rinse several times. Remove blistered or chipped paint with a paint scraper, trying not to gauge the wood. Sand with 80-grit then 220-grit sandpaper. Remove dust with a lint-free cloth.
- Fill gaps and cracks with paintable caulk or glazing compound. Remove the excess and smooth the joint with your finger. Fill holes and gauges with lightweight spackling compound. Remove the excess material with the edge of a putty knife and let it dry.
- Spot prime any knots or resin pockets with white pigmented shellac primer and let it dry. Mask all adjacent surfaces with blue painter’s masking tape, sealing the edges firmly. Wipe down the surface with denatured alcohol or a paint deglosser immediately before priming.
- Prime the entire surface with a stain-blocking primer. After 24 hours sand with 220-grit sandpaper and wipe the sanded surface with a damp sponge or rag. Apply the finish coat of paint with a 2-inch trim brush. Remove the masking tape while the paint is still wet.
Work smart
Professional tips
Don’t overwork the paint. Flow it on, and then let it level itself to leave a surface free of brush marks. If you do get brush marks, let the paint dry, sand with 120-grit sandpaper, and repaint.
Professional painters may prefer a “cigar” or “hot dog” roller for painting doors. This 6-inch-wide dense foam roller leaves a smooth finish coat without brush marks. You will need to brush in bevels in the door panels before rolling.

Window-painting basics
Time to complete:
Experienced 1hr
Handy 1.5hrs
Navice 2hrs
Materials: TSP solution, wood putty, paintable caulk, primer, paint, sandpaper, blue painter’s masking tape
Tools: Paint scraper, sash knife, tack cloth, putty knife, pry bar (for removing trim), 2-inch sash brush, utility knife, window scraper or single-edge razor blades, bucket, sponge
Windows and sills work hard, taking a beating from sun, rain, and condensation, holding potted plants, and being opened and closed repeatedly. They deserve a high-quality, smooth, and durable finish, but it’s not always an easy job. The sheer number of separate pieces is a challenge. The casing, the sill or stool, and the sashes muntins (thin wooden strips that separate the lights, or panes, of glass) all need to be covered with paint, yet the panes must be completely paint-free.
Good prep work is essential when painting windows-the worse they are, the more it takes. Chips and blistering are common on windows, requiring a scraper and sandpaper. You’ll also want to sand and degloss the existing finish-even if it’s in good condition-so that the new finish will adhere. Mask off the glass and the surrounding wall to decrease cleanup time, but be prepared with new razor blades to clean off any paint that still adheres to the glass.
Finally, reduce frustration on this somewhat finicky job by purchasing a 1 ½-inch angled sash brush-it’s a good choice for most situations.
- Scrape and sand damaged areas. If either sash is painted shut free it with a sash saw. Slip the blade into the crack, working the blade back and forth to break the paint bond. Wash greasy or dirty areas with TSP solution. Being careful not to scratch the glass, remove loose paint with a scraper. Sand to remove the sheen from glossy paints and blend in scraped areas. Remove the dust with a tack cloth.
- Fill holes and caulk any gaps. Use wood putty to fill holes or gouges, leveling it with a putty knife. Run a bead of paintable caulk along any gaps between the wall and the window frame; smooth the caulk with a wet finger.
- If possible remove the sashes. If you paint them on sawhorses; it’s easier to avoid runs. On many newer windows, the sashes pop out with little trouble. On older windows, you can paint the sashes in place or carefully pry off the side trim before removing the sashes. (Use a wide, stiff putty knife before graduating to a pry bar, which might leave marks.
- Mask panes and the surrounding wall. If painting the sashes in place, as shown here, use painter’s masking tape to avoid getting primer and paint on the glass and wall.
- Apply tinted primer with a sash brush. If the window has snap-out grilles, remove them to paint. If it has muntins, paint them first. Next paint all horizontal parts of the sash, followed by the verticals, and finally the sill (painting in this order limits drips). To keep sashes from sticking, don’t prime or paint the sides of the windows or the track in which they travel. If priming the sashes in place, raise and lower them to get to surfaces that are inaccessible when the window is closed; also move them as the primer dries to prevent sticking.
- Apply one or more finish coats. Again using the sash brush, apply paint the same way you applied primer. If you used a tinted primer, one top coat may be enough. If the primer shows through or an edge didn’t get painted, apply a second top coat.
- Remove masking tape from the glass as soon as the paint skins over to prevent pulling up the paint later. Fix mistakes by drawing a sharp utility knife along the edges of each pane, leaving a thin margin of paint on the glass; push a window scraper or single-edge razor blade toward this cut line to remove the excess paint.
Work smart
Don’t paint the cracks
Painting the crack between the frame and window sash is a no-no. Once the paint dries, you’ll be unable to open the window (This may be helpful if you are trying to eliminate all air infiltration permanently). To avoid the problem, brush the sash and the frame in two separate strokes, using a minimum amount of paint. Move the sash up and down a few times as the paint dries.
Tool tip
Do get the window open
Windows must be able to open for safety. Use a sash knife to open windows sealed shut by dried paint. Or try a utility knife or a hacksaw blade. Sometimes a good tap with a rubber matletis enough to open it. Once the window opens, mask off the painted areas and spray the tracks with silicone spray for lubrication. Avoid getting the spray on finished areas because it will make it difficult for paint to adhere.
Work smart
Trim lasts longer
Use neutral colors for painted trim and save bolder colors for the walls. Later if you change the color of the room. You won’t have to repaint the trim. Which is far more tedious to paint than walls.