Plumbing
Overview
I like to think of the plumbing system in a house as containing five main components:
- Water source: well or municipal
- Water heater
- Distribution piping
- Drain piping/venting
- Fixtures

Water Source: Well or Municipal
Water is supplied to the house in one of two ways: either from a well located on the property or from the local municipality via pipes in the street.
For houses that rely on wells for their water, there are two types of wells-shallow (less than 50 feet deep) and deep (more than 50 feet and up to several hundred feet deep). Wells rely on pumps to move the water from the well to the house, and these pumps can be located in the well (common for deep wells) or exterior to the well, perhaps even in the basement of the house (common for shallow wells).
In conjunction with the pump is a water pressure tank that usually resides in the basement, where the water line comes into the house. This tank is used to store water and to provide water pressure to the house.
Houses that rely on water from the city will have a main line coming into the house from the street. This line will generally run underground from the street in front of the house to the interior of the house, in the shortest configuration possible. In other words, if you’re trying to determine where the main water line comes into the house, start at the front of the garage or along the basement wall closest to the street. There will be a water meter-used to measure the amount of water coming into the house to generate your water bill-either near the street or in the basement of the house where the main line comes in. When this shutoff valve is closed, no water will run through the house. It’s important to know where this is, in case there is ever a major leak in the house and you need to completely shut off the water.
The other major component you should be aware of at this point in the plumbing system is the pressure reducing valve (PRV). This mechanical device is used to regulate the pressure in the house, reducing the high pressure of the incoming water to a more comfortable pressure for the fixtures in the house.
Typically, the PRV will keep the water pressure between 30-60 pounds per square inch (psi). If the PRV fails, water pressure will increase above this acceptable threshold and you may hear rattling in your pipes or have issues with your plumbing fixtures. When this happens; your PRV will need to be replaced. Depending on the water pressure from the municipal water supply and how well it is maintained, a PRV may last as short as ten years or as long as the life of the house.
Water Heater
If you follow the water line past the main shutoff valve, the first major appliance you will see is the water heater. Water comes directly into the house and into the water heater, where water is heated to supply hot water to the house.
The water heater may run on gas or electricity, with gas being more common these days. Gas water heaters use gas to light a pilot that starts a flame, which heats the water in the tank; electric water heaters contain a heating element that heats water much like an electric stove heats water in a pot.
Water heaters generally hold 30 to 50 gallons of water and last eight to ten years. From the water heater, there will be two lines-one for hot water and one for cold water. These two lines will branch off and supply water to all the fixtures throughout the house.
Distribution Piping
The distribution piping consists of all the hot and cold-water lines branching through the house. In most cases, the hot and cold lines will run next to each other to each of the fixtures.
These supply lines are generally made of copper, steel, or a plastic material (PVC or CPVC), though Pex (a flexible plastic piping material) is exceptionally cheap, easy to use, and is becoming more common these days.
Copper, PVC, and Pex piping should last for the life of the house, and unless there is specific damage to the piping, you shouldn’t have to worry about rust or deterioration.
Drain Piping/Venting
All sinks, tubs, and toilets will have larger pipes-generally 3”-4” in diameter-that take waste and water from the fixture to a main drain line (called the “stack”) that runs vertically from below the foundation of the house (where the wastewater is taken from the house) all the way up through the roof, where it ends with a vent open to the air.
The top of the stack is vented out through the roof in order to maintain neutral air pressure in the system and to allow sewage gases to escape so that the gas doesn’t end up back in the house, causing sickness and odour. The drain line from each fixture will tie into the main stack at two points: towards the bottom of the stack where the wastewater flows and towards the top of the stack to allow the gas to escape.
At its lowest point in the house, the stack turns and runs horizontally, draining out of the house to link up with the city sewer or the septic system.
Drain lines are commonly made of PVC, especially in houses built after the 1960s. In older houses, it is not uncommon to see drain lines made of galvanized steel, cast iron, copper, or even lead. For the most part, drain lines of all material will often last the life of the house.
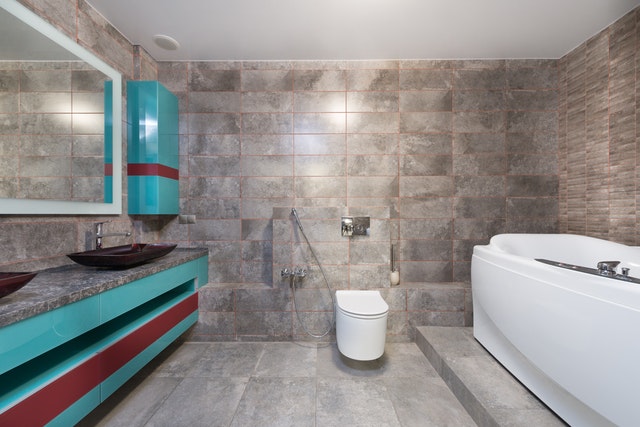
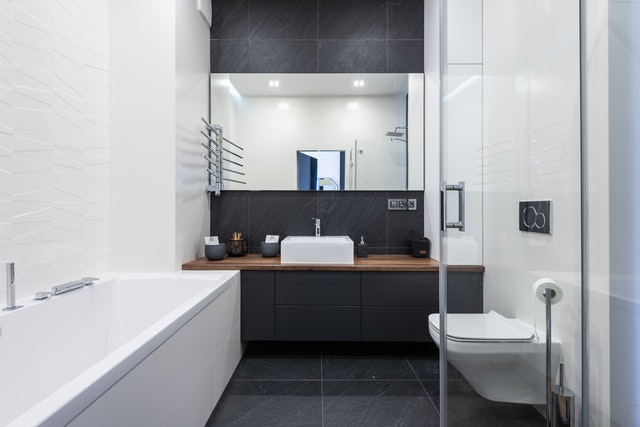
Fixtures
The plumbing fixtures include all the things the supply and drain lines hook up to, including sinks and faucets, tubs and showers, toilets, dishwasher, washing machine, and hose bibs (exterior connectors where hoses attach).
Inspection Tips
When inspecting the plumbing of a home you’re considering purchasing, the primary goal is to rule out any costly repairs. In many cases, you’ll be replacing cosmetic plumbing fixtures like toilets, faucets, and sinks, so any minor issues related to those are likely to be repaired during a basic renovation.
While it’s unlikely you’ll be familiar with all plumbing codes in your area-I’ve been doing this a long time and I’m not familiar with all my local codes-there are still many basic plumbing items you can identify during your inspection. Remember, even identifying potential issues will allow you to bring in an expert to examine more closely and help you avoid any expensive surprises down the road.
- If the property’s water source is a well, there are a couple of things you will want, to verify, and would be wise to bring in an expert to assist:
First, if the property relies on well water, you should include a contingency in your contract that will allow you to get the water tested. Contaminated wells can be one of the costliest issues you ever face, as there may not be any cost-effective fix.
Next, if the property was previously on a well and either a new well has been dug or the property is now on municipal water, you should bring in an expert to verify that the old well was properly abandoned. This is now a requirement in many jurisdictions, and the cost of properly abandoning a well can run well into the thousands of dollars for deep wells.
- If your property is served by city water, there are two tests I like to perform that will give an indication of any plumbing leaks on the property:
First, to test if there are any interior water leaks, turn off all the water sources in the property and then find the water meter. On many water meters, there is an indication of whether water is flowing or not- for example, a spinning mechanical arrow. If the water meter indicates that water is flowing through it-but all the interior plumbing fixtures are off-this can be an indication of a leak somewhere past the meter.
Second, if your water meter sits at the street near your property line, you can turn the interior water off at the main water shutoff valve and observe the meter. If water is flowing through the meter when the main shutoff is closed, this is an indication of a leak between the meter and the shutoff valve. In many cases, that leak will be in the main line running from the street to the house.
- The next thing I will do when inspecting the plumbing system at a potential property is to determine whether the water heater should be replaced. There are several things you should look for and consider:
First, try to determine the age of the heater. Typically, there is a sticker or plaque attached to the side or top of the heater that contains basic information-manufacturer, model number, serial number, etc. In many cases, the manufacturer date will be listed here as well. In some cases, you can glean the manufacturer year from the serial number. If the water heater is more than eight years old, you should seriously consider replacing it.
A common failure point of water heaters is that the bottom will rust, and water will leak out of the tank. Obviously, large amounts of water leaking from the tank can do major damage to the house, so I recommend taking a thorough look around and under the water heater to rule out any major rust or leaks. If you see rust on or under the heater, I recommend replacing it to reduce your risk of a major leak.
You will want to verify that the size of the water heater is appropriate for the size of the house and the number of bathrooms. If the property has more than one bathroom and you expect more than two people will be living in the property, you should ensure that the water heater is a minimum of 40 to 50 gallons. For three-bathroom properties and above, consider a larger tank of 60 to 80 gallons.
You should check to see if the water heater has an expansion tank attached. Its purpose is to prevent the pressure from the heated water from being too high. If there isn’t one, depending on the scope of your repairs and whether you need to pull permits, you might want to consider adding one. This may be required to bring the water heater up to code.
Finally, you should turn on the hot water at one or more fixtures to verify that the water heater is working properly and heating the water. If the water doesn’t get hot, on a gas water heater, you can check the pilot light to ensure its lit. On an electric water heater, the heating element will sometimes burn out before the water heater has reached the end of its life-if this happens, the element can be replaced without having to replace the entire heater.
Next, I recommend looking at the supply lines running from the water heater to the rest of the house. Not only should you be looking at the condition of these lines but also considering the material they are made of. Here are a few things to look for:
- If you have a house that is more than 80 years old, you should determine if the supply lines are made of cast iron, steel, or lead piping. For cast iron and steel piping, a thorough inspection of condition is recommended; for lead piping, I recommend getting the water tested to ensure that lead isn’t contaminating the water.
- If you have a house that is more than 50 years old, you should verify that it doesn’t have galvanized steel piping; if it does, the piping is likely reaching the end of its life (it rusts from the inside out) and should be replaced. You can typically identify galvanized pipe by its gray color, threaded joints, and metallic tone when tapped with a screwdriver.
- In houses built in the 1980s and early 1990s, a material called polybutylene was commonly used for supply lines. This is typically a flexible gray plastic pipe and often has the letters “PB” stamped on it. It was later realized that this material breaks down over ten to 20 years and will eventually fail. If you have polybutylene plumbing in your house, you should seriously consider getting all the supply lines replaced prior to reselling; in many cases, this will be a red flag to both inspectors and lenders.
- I recommend testing every plumbing fixture in the house. This includes faucets, showers, toilets, appliances, and hose bibs. Even if you plan to replace some or all of these fixtures, testing them can reveal leaks, backups, and water pressure issues that you otherwise might not catch until after you’ve finalized your budget.
- If you have any concerns about the proper functioning of the drain lines or sewer line, you can close and fill all the sinks and tubs, and then allow them all to drain at the same-flushing the toilets simultaneously. If any of the fixtures drain slowly, or not at all, this can be an indication of clog or backup.
- Lastly, you should check for water stains under sinks and discoloration on ceilings, which can be indications of water leaks.

Life Expectancy
Life expectancy of the major plumbing components is covered in the section above.
Scope of Work (SOW) Tasks
Plumbing is one of the largest and most complex systems in the house, and therefore the range of possible renovation tasks is quite large. Below, I will detail most common repairs you’ll experience and the specific circumstances under which you’ll want to complete them:
Service Call
Any time a plumber visits your property, he will charge a minimum fee for his time and expertise. This minimum is generally referred to as a “service fee” or “service call fee.”
Replace Main Line
If you turn off the water to your house at the first main shutoff valve past the plumbing meter (on the house side of the meter), you should be able to observe the meter to determine if any water is flowing through it. If the house water supply is turned off, but water is still flowing through the meter, the likely culprit is a leak in the main line. Another indication of a burst main line is if you notice water percolating to the top of the soil or wet soil between the street and the house where the plumbing line is likely to be coming in.
If you notice either of these things, you should have a plumber investigate as soon as possible, as a burst main line can cause serious issues, including soil erosion around the foundation.
Replace PRV
If you notice that the water pressure in the house seems higher than what is typical, or if you hear rattling in the pipes when water is turned on, it’s possible that the pressure reducing valve (PRV) has failed and the water pressure in the house is much too high. High water pressure is uncomfortable for the occupants and can also cause damage to plumbing fixtures and appliances.
If you notice these things, you should have a plumber investigate. It’s quick and easy for a plumber to test the water pressure in the house to determine if the PRV needs to be replaced.
Replace Water Heater
If the water heater in your house is more than eight years old (and certainly if it’s more than ten years old), if you notice that the bottom of the heater is rusty or leaking, or if the heater is not heating water (no flame on a gas heater or heater or heating element not working on an electric heater), it’s probably time to replace the water heater.
In many jurisdictions, building codes will require an additional tank (called an expansion tank) to be attached to the heater to handle any water overflow from the heater due to increased pressure from the heated water. If your plumber installs this tank (and charges you for it), its likely your local building codes require it.
In general, I like to replace the water heater if there is any possibility that it is near the end of its life. Not only can a failed heater cause a mess if it leaks, but many inspectors will note if a water heater is old and your buyer will request you to replace it prior to the sale closing. It’s easier to just do it while the rest of the rehab is underway.
Replace All Supply Lines
In some cases, you may need to replace all the supply lines in your house. This is most common when you have a bad piping material (such as polybutylene), when your plumbing has been stolen (copper pipes are often the target of thieves), or when you have an exceptionally old house with rusted galvanized steel or dangerous lead piping.
Repiping a house may be very easy if there is a basement with ceiling access, an open attic or crawl-space, or no sheetrock in the house; or it may be very difficult if existing plumbering runs under a slab or if pipes run in hard to reach areas or behind sheet-rocked walls. More complex repiping jobs will take longer and will be costlier, but a typical 3-bedroom, 2-bathroom house can generally be fully repiped in a day or less.
Replace Tub/Shower Combo Units
Many houses these days use pre-formed fiberglass tubs, showers or tub/shower combos that can be purchased off the shelf from big-box stores. This is the alternative to a stand-alone steel tub or a custom-built tile shower.
I will normally use these fiberglass tub/shower combos in my houses, unless I am doing something relatively high-end, in which case I’ll build a tile shower in the master bath and still use the fiberglass tub/showers in the secondary bathrooms.
Installing a new fiberglass tub-especially in an area where one didn’t exist before-may require some additional framing work, so make sure you discuss tub installation with your carpenter during the framing stage of the renovation and before the tub is to be installed.
Build Tile Shower
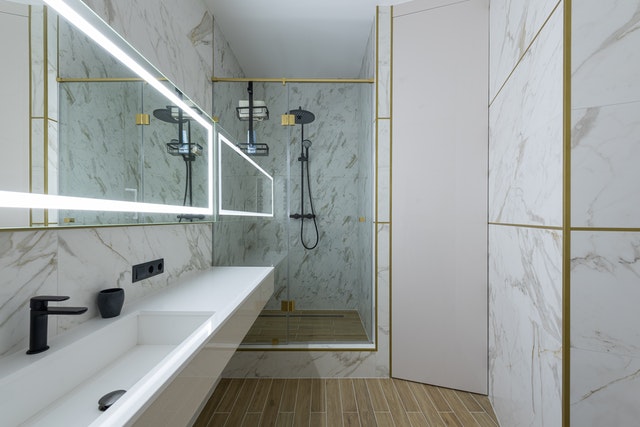
In higher-end remodels, tiles showers are standard. These custom showers can be built to any size or shape specification, and the use of custom tile designs can make your shower distinctive. These custom showers will either have an off-the-shelf plastic base that is installed before the rest of the shower is built and tiled or will have a poured concrete base that allows the base of the shower to be tiled as well. Custom showers will generally require some custom framing and extra sheetrock work, so be sure to discuss the shower design with your carpenter and sheetrocker before having your plumber or tile installer start work. Also, because the tile work for a custom shower is often intricate, I would recommend not skimping on price when it comes to your tile installer-good tile work will stand out in a good way, while bad tile work will stand out in a very bad way.
Lastly, note that most custom showers will require custom glass or glass door solutions.
The specific set of tasks associated with installing a custom shower are:
- Framing (to be part of the framing component)
- Sheetrock/cement-board (to be part of the sheet-rock component)
- Installing off-the-shelf base or pouring concrete base and attaching to drain.
- Tiling and grouting
- Installing glass and door
Install or Replace Sinks
If you’ll be replacing kitchen or vanity bathroom sinks, you’ll need to budget for the labor and materials cost of sink replacement. Even if you’ll be keeping the sinks, if you plan to replace kitchen cabinets or bathroom vanities, you’ll need to pay the labor cost of sink replacement, as the plumber will need to pull the sink out of the old cabinet and install it in the new cabinet.
I usually always replace sinks when I replace cabinets or vanities and will often replace drop-in steel kitchen sinks even if I don’t replace the kitchen cabinets, as these steel sinks tend to get rusty and stained. If you plan to get new bathroom vanities, make sure you note the size and shape of the hole that is drilled into the vanity for the sinks so that you can buy the correct replacement sinks.
Install or Replace Faucets
If you’ll be replacing kitchen or bathroom faucets, you’ll need to budget for the labor and materials cost of faucet replacement. Even if you’ll be keeping the faucets, if you plan to replace kitchen cabinets or bathroom vanities, you’ll need to pay the labor cost of faucet replacement, as the plumber will need to pull the faucet out of the old cabinet or sink and install it in the new cabinet or sink.
I always replace all the faucets in the house, unless the existing faucets are brand new and match the look and feel of the other fixtures I use throughout the house.
Install or Replace Shower/Tub Hardware
I always replace all tub and shower hardware when doing a renovation.
If the existing hardware is relatively new (less than 15 years old) and a standard model, you can generally just replace the trim kit (the parts of the hardware that can be seen, such as the knobs and the stem/showerhead). But if you’re installing a new tub/shower combo, if the existing hardware is very old or if the existing model is not standard, you’ll need to replace both the trim kit and the internal mechanism of the hardware as well (called the “mixer”).
Make sure you know if you need just the trim kit or the entire mechanism, so that you can buy the appropriate materials.
Install or Replace Toilet
I always replace all toilets when doing a renovation. Personally, I hate the thought of using someone else’s toilet when I move into a house, and buyers appreciate clean and new toilets in their new house.
Replace Washer Box
The washer box is the plastic box that holds the hot and cold water hookups and the drain hole for the laundry washing machine. If these lines and drain don’t exist, or if any of the lines are leaking, it is generally easier to install a whole new washer box than to try to fix the existing components.
If you see mold around the sheetrock or baseboards in the laundry area, it’s likely due to leaks in the lines coming in and out of the washer box and is a good indication the washer box should be replaced. Note that replacing the washer box- and fixing the lines coming in and out of it-may require some sheetrock patching, depending on the exact location of the leak and the existing sheetrock damage.
Install or Replace Dishwasher
Most dishwashers will use a supply line branched off from the kitchen sink and a drain line that attaches to the drain at the kitchen sink. These lines are often run behind or through the base cabinets between the sink and the dishwasher and then are hooked up to the dishwasher.
If these lines already exist (for example, if you’re replacing an existing dishwasher in the same location), the plumber will just need to hook up the existing lines to the new dishwasher. If they don’t exist, he’ll need to run the lines as well as hook them up both at the dishwasher and at the sink.
Fix Leaks

Plumbing leaks come in all shapes and sizes. In some cases, the leaky pipe is easily accessed and repaired (for example, under a sink) and in some cases the leaky pipe is tremendously difficult to access and repair (for example, when the leak is under a concrete foundation slab).
Under-slab leaks are generally the most complicated and costly to fix; the process involves locating the leak, jack-hammering the concrete, fixing the pipe, and then patching the concrete. In some cases, it’s easier for the plumber to bypass the leak by abandoning the pipes under the slab and running new pipes through the house-above the slab-therefore not requiring any concrete demo or repair.
A good plumber will always evaluate solutions that don’t require concrete work or demolition of other expensive parts of the house.
In many cases, expect to pay an hourly rate for leak fixes. Because it can often be difficult to pinpoint the problem and implement a solution, plumbers prefer to work on an hourly basis rather than give a fixed quote prior to solving the problem.
Unclog Drains
If you have drains in your house that don’t flow well, it may be the result of a localized clog in a drain line other than the main drain line, or it may be a result of a clog in the main drain. If multiple drains are backing up, that’s an indication of a main drain line clog.
Plumbers have several solutions for resolving clogged drains, depending on the location, source and severity of the clog.
Generally, expect to pay an hourly rate for fixing clogged drain lines.
Cost Guidelines
Here is what to expect In terms of plumbing costs:
Service Call
$60-$100
If you have a plumber visit your property for any reason, expect to pay for a service call, which typically amounts to the cost of an hour of the plumber’s time. So, even if the work you need done only requires ten minutes of work and no materials, you should still expect to pay this minimum fee.
Replace Main Line
$1.500-$3,000 for standard replacement
$3,000+ in areas where building codes are more stringent, or when repairing or replacing a line under a slab.
The price range will likely be determined by which part of the country you lie in. In exceptionally cold climates, codes will require that main lines be made of galvanized steel or copper, and be buried very deep, below the frost line (4’or more). This increases the cost tremendously in those areas.
Also, this price assumes that the length is less than 100’run of pipe from street to house and that there are no major obstacles in the way of replacing the pipe. In many cases, the plumber can avoid digging a trench to replace the pipe by attaching the new pipe to one end of the old pipe and literally pulling the new pipe through the existing trench while removing the old pipe at the same time. This can help avoid having to tear up driveways and other concrete paths that the pipe might run under.
Also note that in some cases, the main line will run some distance under the slab of a house before it connects to the water heater; if the main line breaks under the slab of the house, it’s likely your plumber will need to cut through the concrete slab to repair the line, potentially adding thousands of dollars to the cost of repairs.
Replace PRV
$150-$300
The cost of the valve itself will be $40-$100, depending on the type and quality, and the work should take a qualified plumber about an hour.
Replace Water Heater
$550-$1,050
If you plan to purchase the materials yourself at a big box store, except the costs to break down as follows:
Labor: $150-$250
Materials: $400-$800
This cost should include the removal of the old water heater, replacement with a standard 30-50-gallon tank, and then disposal of the old parts. The work should take a qualified plumber a couple hours.
There tends to be about $200 price difference between 30-gallon and 40-gallon water heaters and between 40-gallon and 50-gallon water heaters, but I highly recommend paying for a larger tank in any house that has at least two bathrooms. This will be a selling feature and your buyers will appreciate it.
Replace All Supply Lines
$250-$350 per fixture
The cost to repipe a house with all new supply lines is generally based on the number of fixtures that are being replumbed. Fixtures include toilets, faucets, shower/tub hook-ups, dishwasher, washing machine lines, and hose bibs.
A standard 3-bedroom, 2-bathroom house will have 15 to 20 fixtures, and repiping should cost somewhere around $4,000-$7,000. The work should take one or two qualified plumbers a full day. This price does not include any drywall repairs that will need to be made after repiping is completed.
Install or Replace Shower/Tub
Labor: $250-$500
Materials: $300-$600
This assumes a standard 3-piece fiberglass tub surround that you can purchase at any of the big-box stores.
Keep in mind that the labor price could be higher if there is extra work to level the floor, replace any studs that the tub needs to be attached to, or replace insulation behind the tub.
Build Tile Shower
Labor: $20-$30 per square foot of tiled space
Materials: $3-$10 per square foot of tiled space
This labor price will include both the plumber and the tile installation cost, plus the cost of installing either a pre-fabricated plastic shower base or a cement base that will be tiled over. The material price will include the tile, the grout, the cement, and the installation materials.
Before the shower is tiled, the walls will need to be built to specification. This work should be covered under the framing component. Once the walls are built, your plumber will be responsible for installing a pre-form plastic shower base or pouring a concrete base that can be tiled over. Your tile guy will likely be responsible for installing the cement board, tiling the walls and floor, and grouting the tile. Expect his work to take up to a week.
Install or Replace Sinks
Labor: $50-$100
Materials: $30-$150
A typical bathroom vanity sink will cost $30-$60 and a typical stainless-steel drop-in kitchen sink will cost $100-$150 for low-to mid-level quality. The price includes both installation of the sink and reconnecting the drain line.
If you’ll be installing granite countertops, the cost to provide and install sinks will likely be included in the granite price and will be completed by the granite installer. Likewise, if you’ll be installing a bathroom vanity with a pre-fabricated top and sink, the installation will be done by your cabinet installer. In both of these cases, the plumber will still need to hook up the drain line to the new sink, which should cost $40-$60.
Install or Replace Faucets
Labor: $40-$80
Materials: $20-$200
A typical bathroom faucet will cost $20-$60 and a typical kitchen faucet will cost $80-$200 for low-to mid-level quality.
Install or Replace Shower/Tub Hardware
Labor: $40-$150
Materials: $50-$200
The labor pricing will depend will depend on whether you are just replacing the trim kit or whether the mixer is being replaced as well. If you’ll be replacing the mixer as well, the plumber will likely need to cut into the wall behind the tub, which may result in some separate drywall patching. Likewise, the material costs will highly depend on quality of the hardware and whether you are purchasing just a trim kit or a full kit with mixer.
Install or Replace Toilets
Labor: $60-$100
Materials: $100-$200 for each one.
Replace Washer Box
$150-$250
Install Dishwasher
$80-$150
Fix Leaks
$50-$500 for each one.
The cost to fix a leak will depend on how accessible the pipe is the severity of the leak, and the piping material used. For a typical leak in a supply or drain line, the work should only take an hour or two and will generally cost less than $250. For leaks under the slab where the plumber will need to run a new line above the slab to replace the leaking pipe, expect to pay up to $500.
In the case where you have a leak under the slab that must be repaired under the slab, prices could escalate to over $1.000 to find the specific location of the leak, tear up the concrete, and then patch the concrete after fixing the leak. Keep in mind that repairing a leak may require damaging sheetrock, concrete, or cabinets, depending on where the leak is. Factor the cost of repairing any damage into other components.
Unclog Drains
$80-$150 for each one.
Determining Your Local Prices
Many plumbers will be willing to give you a ballpark figure for each of these tasks over the phone, though for more complex tasks (like building a custom shower), the contractor will likely want to see the job before throwing out a price. My recommendation is to ask the cost of repiping the house, and if the plumber will throw out a per-fixture price, that’s a good sign (especially if it’s a good price). If he won’t throw out the price for repiping without seeing the job, ask how much he charges to replace a toilet or faucet-that should give you an idea of whether his other costs will be on the low end or the high end. Keep in mind that most licensed plumbers will be accustomed to doing retail jobs, and will typically charge by the hour, not the task. You may be well served to explain to the plumber your business model and see if they are willing to give you fixed pricing for the common tasks you’ll be asking them to do, such as installing sinks, faucets, and toilets.
Plumbers tend to be more expensive than most contractors-they have formal education and require licenses that many other contractors won’t be required to have-so pricing is often much higher than having unlicensed handymen complete the work. It’s up to you which way to go, but again, I highly recommend that anyone who is working on plumbing tasks in your property have appropriate licensing and insurance.
How to Pay For the Job
A licensed plumber will typically not require much, if any, of an upfront payment, especially for small jobs. But for large projects that will take place over the course of several weeks-for example, when the plumber has both rough and finish work to do at different phases of the project-he may want payment in several draws.

[contact-form-7 id=”40″ title=”Quote Form”]